27 October 2022
|

Evaporative condensers are an efficient and cost-effective heat rejection solution for various applications, writes Steve Kline, product applications manager at Baltimore Aircoil Company.
The units work by condensing superheated refrigerant vapour inside a coil that is continually sprayed with water. As the water evaporates, fans reject the heated water vapour to the atmosphere. By lowering system condensing temperatures, evaporative condensers reduce compressor horsepower requirements, resulting in energy savings of up to 15% when compared to air-cooled systems.
A comprehensive programme of routine preventive maintenance will keep refrigeration systems performing at peak efficiency, maximise system operating life, and reduce unplanned downtime due to equipment failure. It also helps to ensure reliable and safe operation, which is critically important to avoid leakage of ammonia and other refrigerants.
Regular inspections are, of course, key and should be done in accordance with the manufacturer’s recommendations and plant preventative maintenance schedule. Below are general guidelines for the areas of inspection that should be part of any effective evaporative condenser preventive maintenance programme. These guidelines cover inspections in 10 areas. Although maintenance frequency will depend on a variety of factors — eg condition of circulating water, cleanliness of ambient air, and the unit’s operating environment — each area of inspection should be performed at least annually and more frequently as recommended by the manufacturer for a particular component or as circumstances warrant.
For each inspection, it is important to document the inspection process and all findings, the date of the inspection, the name of the person performing the inspection, any actions taken. If any additional future actions or repairs are necessary perform per manufactures recommendations or industry standards. Digital images are a useful method for documenting present conditions and demonstrating changes over time.
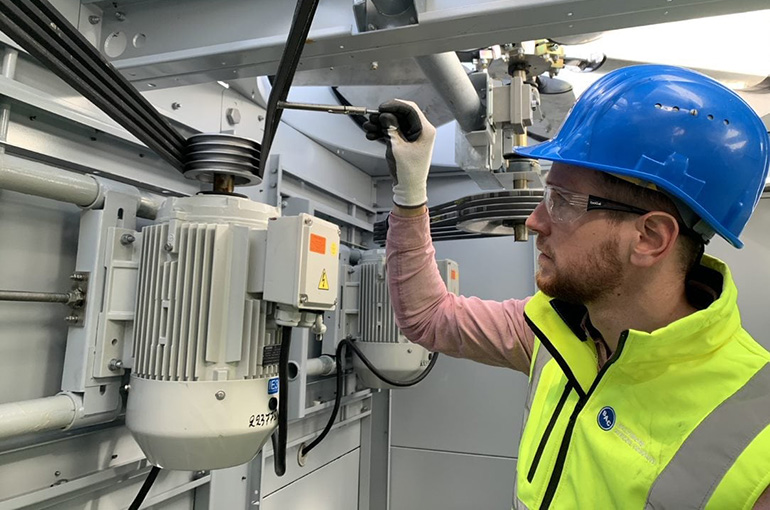
To ensure worker safety, all proper lock out-tag out procedures for the unit and any site safety procedures must be followed prior to beginning inspection or maintenance work. Additionally, measures must be taken to confirm there is no refrigerant left in the coil. This is usually done by employing a vacuum system prior to entering or servicing the condenser. Always follow industry best practices regarding the use of proper PPE and “one in-one out” procedures.
Most people carry a smartphone with a good digital camera, which is a useful tool for photographing or recording inspection findings. Other recommended tools include an infrared thermometer, an infrared camera, an ultrasonic metal thickness meter, a vibration meter (ultrasonic or accelerometer), a laser alignment tool, a multimeter for voltage and amperage, a micrometer depth gauge, and a dye penetrant test kit to detect cracks. Importantly, a complete inspection kit will also include the manufacturer’s installation, operation, and maintenance manuals and lock-out / tag out forms.
1. Adequate anchors and supports for unit
A comprehensive maintenance programme begins with a visual inspection of the fundamental structural integrity of the system. This step includes inspecting the condensing unit’s supports and anchors to ensure that it is securely installed. . An inspection should also be made of any improperly supported piping, which could overstress coil connections and cause a leak. Each support should be visually examined, looking for cracks, missing or loose fasteners, and any corrosion.
2. Corrosion of enclosure, tubes, piping and supports
Condensers should be inspected for corrosion at least annually and more often as conditions require. If left untreated, pitting can degrade the wall thickness of a tube or pipe, possibly leading to leaks and burst pipes. Excessive tube scale causes lost condensing capacity and reduced performance. Visually inspect all visible coil surfaces with a flashlight or digital camera. When further examination is necessary, especially of areas that may not be readily visible, a flexible, lighted borescope can be helpful. Wherever possible, measure the depth of large pits with a micrometer depth gauge.
3. Scale build-up on tube bundle
Guarding against scale is critically important to maintaining the capacity of the condenser, which is why condensers should be regularly inspected for scale build-up. Infrared cameras are effective for measuring thermal degradation due to scale.
4. Cracks in fan assemblies
As a mechanical component, fan assemblies need to be inspected at least annually. Fan blades can break off and cause damage to surrounding areas. A loosened motor mount can cause a fan assembly to fall, which may result in extensive damage to the condenser. During inspection, look and listen for any vibrating parts — larger sheet metal parts will usually be the most noticeable. Watch the fan in operation, looking for any vibration as it rotates. Listen for sudden changes in noise levels or tones, and visually inspect the fan assemblies for cracks.
5. Shafts, bearings, motor mounts, belts, and fasteners
A comprehensive inspection includes detection of overheated bearings, belts, or motors using an infrared camera and conducting a visual search for cracked or frayed belts and missing fasteners. A rotating component may fail so follow recommended maintenance procedures in the manufacturer’s operations and maintenance manual to avoid injury and mechanical issues.
6. Scale or dirt build up in drift eliminators and the water sump
Visually inspect the mist eliminators and basin for biological growth, scale build-up, or dirt accumulation. These conditions cause reduced airflow, resulting in increased operating temperature and pressure, which may cause the spray water pump to clog and thereby restrict or stop the flow of water over the coil bundle. If necessary, drain the basin, remove any foreign material and either clean or replace mist eliminators as needed.
7. Safety devices
Check that any safety devices, such as vibration switches, are functioning properly. Follow the manufacturer’s instructions for the frequency of, and procedure for, testing each device. Malfunctioning or missing safety devices could result in unsafe operation of the unit. For example, a disconnected vibration switch could fail to detect a vibrating fan assembly, which could result in catastrophic fan failure and mechanical damage.
8. Electrical connections
Wiring also needs to be inspected for loose connectors or signs of electrical overheating (black marks) as well as for melting or cracking wire insulation. Visually inspect electrical connectors and use an infrared camera to identify overheating electrical components that could fail or catch fire. Contact an electrician to repair or replace defective electrical components that show signs of wear.
9. Spray nozzles
Visually check that spray nozzles are not plugged and are delivering a uniform spray pattern. Poor water spray to the coil surface could result in higher operating temperature and condensing pressure and compromise performance. Always use spray nozzles from the original equipment manufacturer to ensure optimal water coverage.
10. All isolation valves and purge valves
Isolation valves should be checked to ensure that they are functioning and in good condition. Visually inspect the valves to make sure they are free from signs of major corrosion and test the valves to make sure they operate correctly — opening and closing properly without leaks. Replace valves that are malfunctioning or showing excessive corrosion.
Conclusion
Remember, do not wait until the condenser fails to perform maintenance. To maximise the operating life of your system, preventative maintenance is key. Well-maintained equipment will maximise uptime and efficiency and help to keep your system hygienic and safe.